Showing posts with label Tuesdays with Dorie. Show all posts

Wednesday, December 10, 2008

Tuesdays with Dorie - Thanksgiving Twofer Pie

Wow, I am really behind on this...

So, I made this pie twice, once as a normal 9 inch pie, and once as 9 mini-pies. I sent the large pie to my parents for Thanksgiving, and they said it arrived in one piece and tasted very good. The smaller ones I served for Thanksgiving, and I thought they were very good as well. I'm usually not a fan of pumpkin pie, but I love pecan pie, so this was a good mix. I'm sure it was healthier than pecan pie too :)

Tuesday, November 11, 2008

Tuesdays with Dorie - Kugelhopf

I started a bit late on this recipe, so the post is a little late, but hey, it's still Tuesday :)

I liked this recipe (except for the raisins). I substituted some chocolate carmel chips I had, and I like it. The dough is very close to a brioche, just missing a bit of butter (though there is no shortage in this recipe). Next time, I think some cinnamon and some nuts would be a good addition.

I made them into individual servings in a heart shaped muffin tin. I thought filling up the tins about half-way before the rise would be about right, but I was wrong. These definitely overflowed, though they still taste good. I would say to fill the tins no more than 1/3 the next time. You would get about 18 that way (I had 12 monsters). I also shortened the baking time, 10 minutes at first, then 8 minutes with the foil.

Tuesday, November 4, 2008

Tuesdays with Dorie - Rugelach

I have made rugelach quite a few times with different recipes. For me, the trick is to only work with enough dough that it stays cold until I have put it on the pan. So I usually work with small amounts, like Dorie recommends in this recipe.

I made one batch with the filling that Dorie recommends, and one with Nutella and almonds (I saw some of the other TWD bloggers recommend this filling so I had to try it, anything with Nutella is good). Both the raspberry and nutella cookies were good, but they were a bit dry. Next time I will cook them a bit less, this time I had them in for 22 minutes.

Monday, November 3, 2008

Tuesdays with Dorie - Chocolate-Chocolate Cupcakes

I made these a bit late as I wanted to make them for Halloween for my husband to take to some meetings. The recipe was good, some others thought it was a bit dry, so I sub'd in some oil for some of the butter. They came out perfect! Nice and moist, with just a hint of a crust on the top to hold the frosting. I used a double chocolate buttercream instead of the ganache so I could do some decorating with it.

Also in the picture are some vanilla cupcakes with vanilla buttercream. They were good, but not great. I am still looking for that knockout, go to vanilla cupcake recipe. If you have one you recommend, please send it on :)

Sticky Buns

I was craving some sticky buns last weekend, so I decided to plan a little bit ahead and made the Sticky Buns from Dorie's book, Baking: From my home to yours. This was a Tuesday's with Dorie recipe a while ago that I missed, and it got good reviews so I decided to try it.

There is a lot of butter in this dough, since it is a brioche dough I expected it to be rich, but... Anywhos, I made them in a silicone muffin pan to see how they would turn out. I think the larger size muffin pan would have been the perfect size, as these rose out of the tins a bit. The recipe was good and I would make it again, after I eat the frozen one's I've got saved away :)

Tuesday, October 21, 2008

Tuesdays with Dorie - Pumpkin Muffins

I'm not usually a huge pumpkin fan, but I decided to give these a try. The pumpkin flavor is very subtle, and keeps the muffins very moist. I made half with raisins and half without, and I am glad I did that. I did not like the raisins, but my husband did, so who knows...

I would definitely make these again (no raisins), and they make me think of fall (even though it's still 85º here in Texas).

Tuesday, September 2, 2008

Tuesdays with Dorie -Chunky Peanut Butter and Oatmeal Chocolate Chipsters

Wow, that is quite a name for a small cookie. But, they are very good. I halved the recipe (who needs 60 cookies to be tempted with, 30 is a much more reasonable amount :) ). Also, my husband is not a fan of peanut butter, so I used almond butter instead.

These cookies are very good, nice and moist with a slight crunch on the edges. I had to try at least 4 when they came out of the oven, just in case...

Check out the recipe here from Stefany of Proceed with Caution.

Tuesday, August 26, 2008

Tuesdays with Dorie - Chocolate-Banded Ice Cream Torte

Yes, I'm back. All the traveling and leaving my day job got the best of me for a few weeks, but I made it!

This week's recipe from Amy of Food, Family and Fun was pretty simple. The ganache was the only item that took any time, but only about 15 minutes. I used pasteurized eggs as the ganache is not cooked. Basically, its three layers of ganache and ice cream. Waiting for the layers to harden in the freezer is the hardest part.

I made these in ramekins. I wasn't the biggest fan, but my husband liked it (which is surprising since there wasn't much fruit it in).

Wednesday, August 6, 2008

Tuesdays with Dorie - Black and White Banana Cake

Yeah, the recipe makes a loaf, but since I had to make a summer themed cake for my cake decorating class I decided to change this up a bit to work. So instead of cooking it in a loaf pan, I made 2 - 9 inch cakes.

The recipe itself is pretty straightforward, I have been saving the last ripe bananas from our bunches in the freezer for an occasion such as this. I made a simple lemon buttercream for the frosting, and the flavors worked pretty well. I have this thing about banana and nuts, so this wasn't my favorite, but not too bad (some walnuts would have been good). The decorations on top are marshmallow fondant.

I will be sitting out next week as I will be out of town, so look for my post in 2 weeks!

Tuesday, July 29, 2008

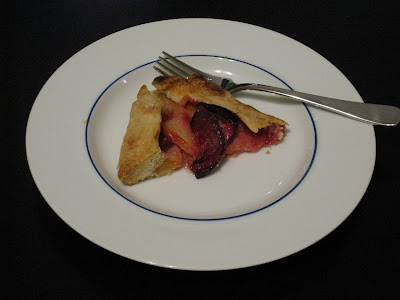
Tuesdays with Dorie - Stone Fruit Galette

Yea for all the seasonal challenges lately! We are flush in peaches and plums here in Texas now, so I used those fruits for the filling of this lovely Galette. This dessert is basically a flaky pie crust wrapped around some fruit and jam and baked until the crust sets. Then, a custard filling is added to the middle and baked until the custard sets.

I downsized this recipe, as usual, by half and then made some personal sized desserts. I like serving things so much better this way. So pretty and less mess...

I liked this recipe, and so did my husband (since it had fruit in it). Peaches are soo good warm :)

If you'd like the recipe, click over here to Michelle in Colorado Springs.

Monday, July 21, 2008

Tuesdays with Dorie - Cobbler

I was going to follow the recipe this time, I really was... but then I couldn't find any rhubarb in the store this week. So I made the recipe, but with berries instead :)

It was very good, I liked the whole wheat dough, I think it added more texture and crunch than the other cobbler in the book. Also, I put some on the bottom of the ramekins which sopped up the juices nicely.

These single serving sizes were great for breakfast, my husband and I had a good Sunday morning.

Friday, July 18, 2008

Tuesdays with Dorie - Perfect Party Cake

I know we aren't suppose to go back and do old recipes, but chocolate pudding just isn't my thing. And, because I am posting this so late, let's just say I skipped this week :)

I am taking a cake decorating class with Steph from Frosted Garden, so I decided I should make a cake to practice with at home. This cake looked awesome, and it didn't disappoint. The cake is very light and lemony, and the swiss buttercream was very smooth and not overly sweet. I had been wanting to make a swiss buttercream since I had been reading my other blogs about them, and how you to have to whip it for a long time and it might look like it's falling apart but just keep whipping, so I had to try it out. Very tasty, but mine was a bit too soft to hold the details of the piping. But good none the less.

One change I made to the recipe was instead of raspberries, I made a mixed berry compote to put between the layers, and no coconut. Very yummy.

Perfect Party Cake, adapted from Dorie Greenspan:
For the Cake:
2 1/4 cups cake flour
1 tablespoon baking powder
½ teaspoon salt
1¼ cups whole buttermilk
4 large egg whites
1 ½ cups sugar
2 teaspoons grated Meyer lemon zest
1 stick (8 tablespoons or 4 ounces) unsalted butter, at room temperature
½ teaspoon pure lemon extract
For the Buttercream:
1 cup sugar
4 large egg whites
3 sticks (12 ounces) unsalted butter, at room temperature
¼ cup fresh Meyer lemon juice
For Finishing:
2/3 cup seedless raspberry preserves stirred vigorously or warmed gently until spreadable
About 1 ½ cups sweetened shredded coconut

Getting Ready:
Centre a rack in the oven and preheat the oven to 350 degrees F. Butter two 9 x 2 inch round cake pans and line the bottom of each pan with a round of buttered parchment or wax paper. Put the pans on a baking sheet.
To Make the Cake:
Sift together the flour, baking powder and salt.Whisk together the milk and egg whites in a medium bowl.Whisk together the sugar and lemon zest in a mixer bowl or another large bowl and rub them together with your fingers until the sugar is moist and fragrant. Add the butter and working with the paddle or whisk attachment, or with a hand mixer, beat at medium speed for a full 3 minutes, until the butter and sugar are very light.Beat in the extract, then add one third of the flour mixture, still beating on medium speed. Beat in half of the milk-egg mixture, then beat in half of the remaining dry ingredients until incorporated. Add the rest of the milk and eggs beating until the batter is homogeneous, then add the last of the dry ingredients. Finally, give the batter a good 2- minute beating to ensure that it is thoroughly mixed and well aerated. Divide the batter between the two pans and smooth the tops with a rubber spatula.Bake for 30-35 minutes, or until the cakes are well risen and springy to the touch – a thin knife inserted into the centers should come out clean
Transfer the cakes to cooling racks and cool for about 5 minutes, then run a knife around the sides of the cakes, unfold them and peel off the paper liners.Invert and cool to room temperature, right side up (the cooled cake layers can be wrapped airtight and stored at room temperature overnight or frozen for up to two months).
To Make the Buttercream:
Put the sugar and egg whites in a mixer bowl or another large heatproof bowl, fit the bowl over a plan of simmering water and whisk constantly, keeping the mixture over the heat, until it feels hot to the touch, about 3 minutes. The sugar should be dissolved, and the mixture will look like shiny marshmallow cream.Remove the bowl from the heat.Working with the whisk attachment or with a hand mixer, beat the meringue on medium speed until it is cool, about 5 minutes.Switch to the paddle attachment if you have one, and add the butter a stick at a time, beating until smooth.Once all the butter is in, beat in the buttercream on medium-high speed until it is thick and very smooth, 6-10 minutes.During this time the buttercream may curdle or separate – just keep beating and it will come together again.On medium speed, gradually beat in more lemon juice, waiting until each addition is absorbed before adding more, and then the vanilla. You should have a shiny smooth, velvety, pristine white buttercream. Press a piece of plastic against the surface of the buttercream and set aside briefly.
To Assemble the Cake:
Using a sharp serrated knife and a gentle sawing motion, slice each layer horizontally in half. Put one layer cut side up on a cardboard cake round or a cake plate protected by strips of wax or parchment paper.Spread it with one third of the preserves.Cover the jam evenly with about one quarter of the buttercream.Top with another layer, spread with preserves and buttercream and then do the same with a third layer (you’ll have used all the jam and have buttercream leftover).Place the last layer cut side down on top of the cake and use the remaining buttercream to frost the sides and top. Press the coconut into the frosting, patting it gently all over the sides and top.ServingThe cake is ready to serve as soon as it is assembled, but I think it’s best to let it sit and set for a couple of hours in a cool room – not the refrigerator. Whether you wait or slice and enjoy it immediately, the cake should be served at room temperature; it loses all its subtlety when it’s cold. Depending on your audience you can serve the cake with just about anything from milk to sweet or bubbly wine.
Storing:
The cake is best the day it is made, but you can refrigerate it, well covered, for up to two days. Bring it to room temperature before serving. If you want to freeze the cake, slide it into the freezer to set, then wrap it really well – it will keep for up to 2 months in the freezer; defrost it, still wrapped overnight in the refrigerator.


Tuesday, July 8, 2008

Tuesday with Dorie - Double Crusted Pie

The last few recipe choices have been great, they have all involved fruits that are in season now! I really like trying to eat seasonally, rather than trying to buy expensive fruits that have flown thousands of miles and don't really taste that great after all that. That being said, blueberries aren't very plentiful here in the oven we call Texas. So, I subbed out the blueberries for blackberries and peaches, both are getting to their peak here. I also used 1/4 cup of tapioca flour instead of the AP flour, I think it has less of a gritty taste and setting up clearer.

I also made a few smaller pies instead of one big one. I love individual sized treats, they are easier to serve, promote less of me eating a whole pie in one sitting, etc. I made 3 pies in a mega muffin pan, and one pie in a 5 inch square dish. Both of them tasted excellent, but I had some issues getting the pies out of the muffin pan. I used a silicon pan, thinking I could carefully pop them out once they had cooled, but the pies had a different idea about that. The 5 inch pie served up excellently, but is more than one normal serving.

I recommend this recipe, the crust stood up well with the fruit, even after a day or 2 in the fridge. If you don't have the book, you can get the recipe here at South in Your Mouth.

Tuesday, July 1, 2008

Tuesdays With Dorie - Apple Cheddar Scones

To start, let me say that I like scones but have never made them before so I was excited at the recipe choice. But then I realized that this weekend I had dedicated to the Daring Bakers Challenge of Danish Braids, and that recipe takes a lot of time and space, neither of which I have a lot of in my kitchen.

So on Saturday, I decided I could squeeze these in, but then I realized I did not have all the ingredients needed, namely the apples and cheddar :) I soldered on, and made them with peaches instead and froze them to bake off for Sunday's breakfast.

Well, I had a bit of an issue with the dough. Since I did not add the cheddar, it was much more unstable, too fragile to cut so I had to work in a bit more flour. After about 1/2 cup more, the dough was much more workable so I could cut out the scones.

They turned out ok, not my favorite scones but good for an easy Sunday breakfast.

Monday, June 23, 2008

Tuesdays with Dorie - Mixed Berry Cobbler

Mmm, lots of berries for me this week! These recipes are timed very well for me, as berries are just coming into season in Texas. As I mentioned in a previous post, blueberries aren't plentiful here, but we are awash with blackberries and raspberries now. So I made the cobbler with fresh blackberries, raspberries, and frozen blueberries (i just couldn't make it without them, they're my favorite!)

I made 2 smaller cobblers from the recipe (so my husband and I could each have one). Since this treat is not very portable, I won't be sharing it at work tomorrow. Not that there will be any leftovers anyway, my husband and I both loved this recipe. Anything with fruit is usually a hit for this crowd.

I changed up the top a bit, adding some ground flaxseed and some wheatgerm for a little extra flavor and heathlyness. I also subbed out the sugar in the berries for 1 tablespoon of agave nectar, the berries are great on there own and didn't need much sweetness.


Tuesday, June 17, 2008

Tuesdays with Dorie - Peppermint Cream Puffs

This week's recipe was fun. It involves some technique in the preparation, but nothing too difficult. The dough is cooked briefly, then beaten with eggs and piped hot (if it cools off, it is hard to pipe and looses some rise in the oven). These little guys also have lots of decorating possibilities. The original recipe was for a ring, but I thought the puffs were a bit more portable, since I don't need a big ring of creamy goodness tempting me all the time :)

They turned out well, the creme has just a hint of mint which goes well with the sweetness of the chocolate. I have made cream puffs before, but with a different baking method. This recipe calls for high heat for 10 minutes, then lower heat for 15. Previously I made them with low heat, then high heat, then low heat to dry them out. I liked that method a bit more, as they get drier without getting as brown. This batch got a little darker then I would have liked before they were dry.

Tuesday, June 10, 2008

Tuesdays with Dorie - La Palette’s Strawberry Tart

This week's recipe was simpler than most, but very tasty none the less. The tart shell on the bottom is more like a sugar cookie than a traditional crust, which balanced nicely with the strawberry jam and fresh strawberries. Since strawberries are in season now, I purchased some great ones from the store, and they didn't need much sugar at all.

My husband is a big fan of fruit centric desserts, so he happily tried this one and liked it. I didn't have any crème fraîche, so we just had it unadorned, gasp! It was still very good and easy to put together, great for an easy but elegant dessert.

Tuesday, June 3, 2008

Tuesdays with Dorie - French Chocolate Brownies

Mmm, brownies for me two weeks in a row :)

I have to say, these are the best brownies I've ever had. I left out the raisins (I'm not a big fan of such a smooth crumb, and then biting into something chewy). I was going to add in pecans instead, but just when they got in the pan is when I remembered, so this patch is plain. But they are soo good. A nice, cracked crust on top, with a moist, light cake underneath. I think it is the cinnamon that makes these pop, just a hint does the trick.

French Chocolate Brownies

- makes 16 brownies -
Adapted from Baking From My Home to Yours.

Ingredients

1/2 cup all-purpose flour
1/8 teaspoon salt
1/8 teaspoon cinnamon (optional)
1/3 cup raisins, dark or golden
1 1/2 tablespoons water
1 1/2 tablespoons dark rum
6 ounces bittersweet chocolate, finely chopped
1 1/2 sticks (12 tablespoons; 6 ounces) unsalted butter, at room temperature and cut into 12 pieces
3 large eggs, at room temperature
1 cup sugar

Getting ready: Center a rack in the oven and preheat the oven to 300°F. Line an 8-inch square baking pan with foil, butter the foil, place the pan on a baking sheet, and set aside.

1. Whisk together the flour, salt and cinnamon, if you're using it.

2. Put the raisins in a small saucepan with the water, bring to a boil over medium heat and cook until the water almost evaporates. Add the rum, let it warm for about 30 seconds, turn off the heat, stand back and ignite the rum. Allow the flames to die down, and set the raisins aside until needed.

3. Put the chocolate in a heatproof bowl and set the bowl over a saucepan of simmering water. Slowly and gently melt the chocolate, stirring occasionally. Remove the bowl from the saucepan and add the butter, stirring so that it melts. It's important that the chocolate and butter not get very hot. However, if the butter is not melting, you can put the bowl back over the still-hot water for a minute. If you've got a couple of little bits of unmelted butter, leave them—it's better to have a few bits than to overheat the whole. Set the chocolate aside for the moment.

4. Working with a stand mixer with the whisk attachment, or with a hand mixer in a large bowl, beat the eggs and sugar until they are thick and pale, about 2 minutes. Lower the mixer speed and pour in the chocolate-butter, mixing only until it is incorporated—you'll have a thick, creamy batter. Add the dry ingredients and mix at low speed for about 30 seconds—the dry ingredients won't be completely incorporated and that's fine. Finish folding in the dry ingredients by hand with a rubber spatula, then fold in the raisins along with any liquid remaining in the pan.

5. Scrape the batter into the pan and bake 50 to 60 minutes, or until the top is dry and crackled and a knife inserted into the center of the cake comes out clean. Transfer the pan to a rack and allow the brownies to cool to warm or room temperature.

6. Carefully lift the brownies out of the pan, using the foil edges as handles, and transfer to a cutting board. With a long-bladed knife, cut the brownies into 16 squares, each roughly 2 inches on a side, taking care not to cut through the foil.

Serving: The brownies are good just warm or at room temperature; they're even fine cold. I like these with a little something on top or alongside—good go-alongs are whipped crème fraiche or whipped cream, ice cream or chocolate sauce or even all three!

Storing: Wrapped well, these can be kept at room temperature for up to 3 days or frozen for up to 2 months.

Tuesday, May 27, 2008

Tuesdays with Dorie - Brownie Buttons

Ok, so I had a party this weekend for Memorial Day with 25 people, and this week's recipe of Pecan Sticky Buns just was not going to fit the theme and I didn't have any extra room to put them. So I made the Brownie Buttons from the book instead. Not exactly the same, but I tried :)

They turned out really well, very chocolaty and a light texture, definitely recommend these...

Brownie Buttons

2 teaspoons lime zest, finely chopped
¾ teaspoon granulated sugar
¼ cup plus 2 tablespoons all purpose flour
pinch salt
½ stick (2 oz) unsalted butter, cut into pieces
2 ½ oz high quality bittersweet chocolate, coarsely chopped
1/3 cup soft light brown sugar
¼ teaspoon vanilla extract
1 large egg

1. Heat the oven to 350ºF. Grease 2 x 12 hole mini muffin pans or use liners.
2. Mix together the orange zest and granulated sugar, set aside. Whisk together the flour and salt, set aside.
3. In a heavy saucepan melt the butter, chocolate and brown sugar – stirring all the time until smooth. Leave for a minute off the heat then stir in the vanilla, egg and zest mixture. Lastly add the flour and salt and mix lightly until it is smooth and shiny.
4. Divide the batter evenly among the muffin cups and bake for 9-10 minutes.


Tuesday, May 20, 2008

Tuesdays with Dorie - Traditional Madeleines

My first Tuesdays with Dorie Challenge! I ordered the book 2 weeks ago, but apparently I didn't get the speediest shipping. So here we are with my first recipe, Madeleines. I don't have a pan for this, and am not a fan of uni-taskers as my kitchen is tiny, so I made do. What did I use, you may ask. Tartlet pans. I use these all the time to make little tarts, shaped cookies, as cookie cutters, etc so I don't consider them a uni-tasker. Plus, they are much easier to store than a big pan. Anywhos, back to the madeleines. They taste great, they puffed up nicely and look to have a bump on the flat side, so I think they came out well, even if not in the traditional shape. The lemony flavor is subtle but nice, and they are very tender.

Traditional Madeleines

2/3 cup all-purpose flour
¾ teaspoon baking powder
Pinch of salt
½ cup sugar
Grated zest of 1 lemon
2 large eggs, at room temperature
2 teaspoons pure vanilla extract
¾ stick (6 tablespoons) unsalted butter, melted and cooled
Confectioners' sugar, for dusting

Whisk together the flour, baking powder and salt.

Working in a mixer bowl, or in a large bowl, rub the sugar and lemon zest together with your fingertips until the sugar is moist and fragrant. Add the eggs to the bowl. Working with the whisk attachment, or with a hand mixer, beat the eggs and sugar together on medium-high speed until pale, thick and light, 2 to 3 minutes. Beat in the vanilla. With a rubber spatula, very gently fold in the dry ingredients, followed by the melted butter. Press a piece of plastic wrap against the surface of the batter and refrigerate it for at least 3 hours, or for up to 2 days. This long chill period will help the batter form the hump that is characteristic of madeleines. (For convenience, you can spoon the batter into the madeleine molds, cover and refrigerate, then bake the cookies directly from the fridge; see below for instructions on prepping the pans.)

GETTING READY TO BAKE: Center a rack in the oven and preheat the oven to 400 degrees F. Butter 12 full-size madeleine molds, or up to 36 mini madeleine molds, dust the insides with flour and tap out the excess. Or, if you have a nonstick pan (or pans), give it a light coating of vegetable cooking spray. If you have a silicone pan, no prep is needed. Place the pan(s) on a baking sheet.

Spoon the batter into the molds, filling each one almost to the top. Don't worry about spreading the batter evenly, the oven's heat will take care of that. Bake large madeleines for 11 to 13 minutes, and minis for 8 to 10 minutes, or until they are golden and the tops spring back when touched. Remove the pan(s) from the oven and release the madeleines from the molds by rapping the edge of the pan against the counter. Gently pry any recalcitrant madeleines from the pan using your fingers or a butter knife. Transfer the cookies to a rack to cool to just warm or to room temperature.

If you are making minis and have more batter, bake the next batch(es), making certain that you cool, then properly prepare the pan(s) before baking.

Just before serving, dust the madeleines with confectioners' sugar.

makes 12 large or 36 mini cookies